Plugins | Unity
Note: This article applies to both Prime 3 Haptic XR Gloves and Prime 3 Mocap Gloves
Note: This article applies to both Quantum Mocap Metagloves and Quantum XR Metagloves.
Installing plugin
- Go to the MANUS Download Center and create a free account or log in if you already have one.
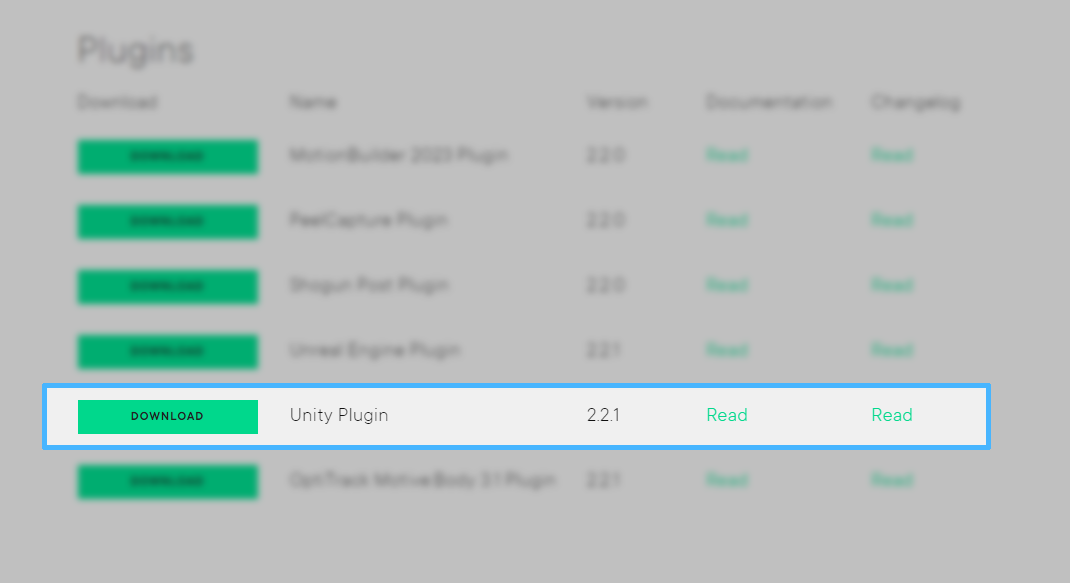
- Download the plugin as a zipped file and save iton your computer. Unzip the file to extract its contents.
- Open your Unity project.
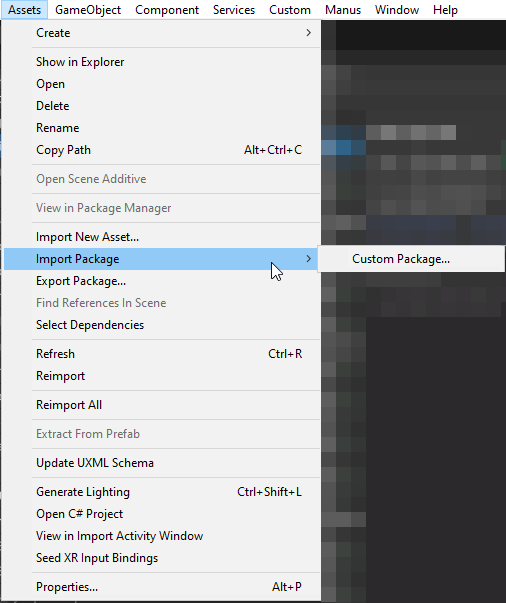
- In Unity Editor, go to "Assets" >"Import Package" > "Custom Package."
- Locate the package file you downloaded and select it.
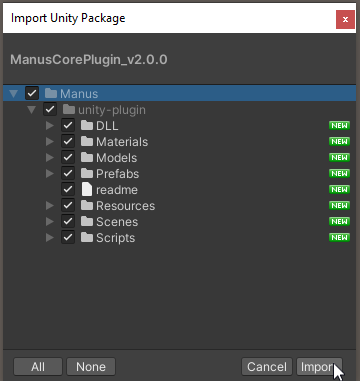
- Click "Import" to start the process.
- Once the import is complete, the assets from the package will be available in your project.
Starting with the unity plugin
- Locate the "Communication Hub" in under “Manus” tab in the toolbar. This is where you can adjust the connection settings.

- Within the Communication Hub, the plugin is set to automatically connect to local hosts only.

- If you want the plugin to search for hosts on the local machine only, make sure the "Connect locally only" optionis enabled.
- To connect automatically to the first host found, ensure that the "Connect Automatically" option is enabled.
- If you want to view all available MANUS Core hosts on the current network, click on the "Get Available Hosts" button. This will provide you with a list of available hosts.

- Select the desired MANUS Core host and click on “Connect”, if everything is right the status should say “Connected To (Name of your host)”
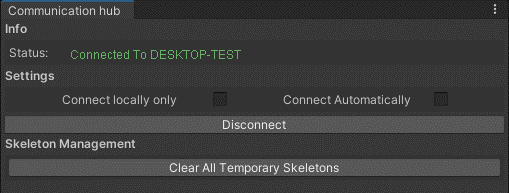
- Once you have adjusted the connection settings as desired, they will be carried over to a build of your project.
- After connecting to a host, if the "Connect Automatically" option is enabled, the plugin will attempt to automatically connect to that previously used host the next time you launch your project.
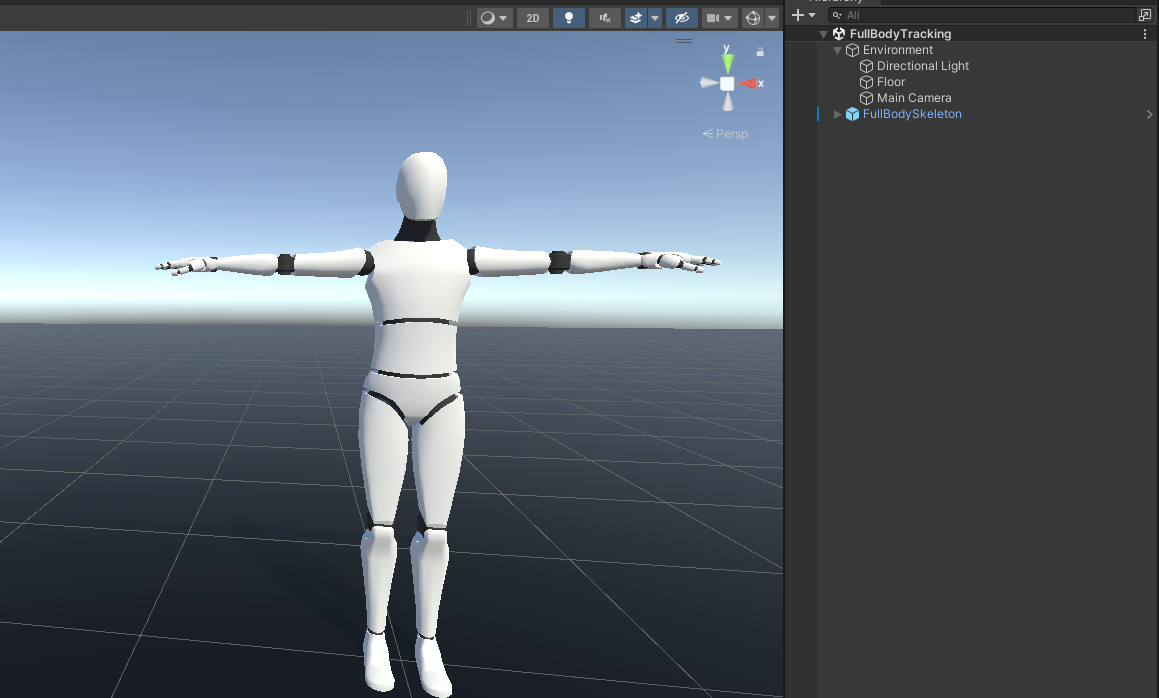
Setting up a model to animate
- Import the model you want to animate into your Unity project. If it's a full body skeleton, make sure it's a Humanoid Biped model.
- Place the model within the scene.
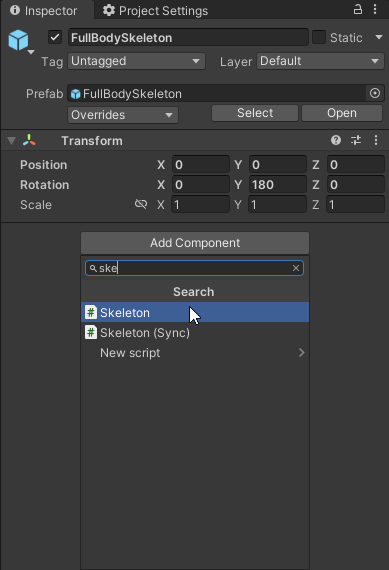
- Select the root of the model's Game object and add the Skeleton script as a new component. You can find it under Manus/Skeletons or by searching for "Skeleton" in the component menu.
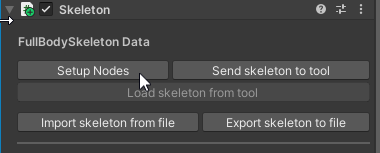
- Press the "Setup nodes" button. This function will automatically find all the transforms under the model, convert them into nodes, and set up their settings.
- Set the"Skeleton Type" option to the appropriate type based on your model:
- For a hand model, set it to "Hand."
- For a full body model, set it to "Both."
- For a body-only model, set it to "Body."

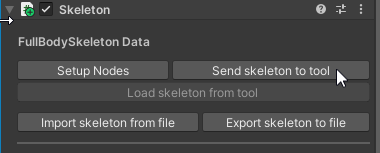
- Press the "Send skeleton to tool" button to send the skeleton nodes to the MANUS DevTools application. This tool helps speed up the chain creation process. Refer to the documentation provided for more details on using the DevTools.
P.S. This button will open the DevTools window on the device hosting the ManusCore that your plugin is connected to.
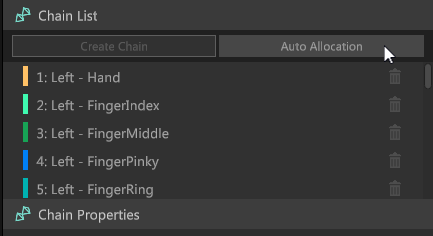
- In the DevTools application, if necessary, press "Auto Allocation" to automatically allocate the chains. Then, send the modified skeleton back to Unity by clicking "Send to plugin."

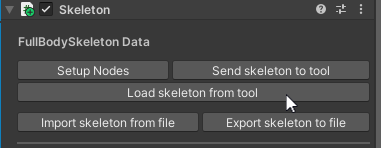
- In Unity, go to the Skeleton inspector and press "Load skeleton from tool" to load the modified skeleton sent from the DevTools.
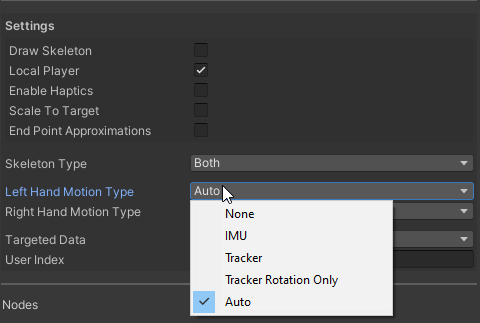
- Ensure that the "Hand Motion Type" is set correctly based on your desired tracking source:
- "IMU" uses the gloves' orientation.
- "Tracker" uses a tracker's orientation and position.
- "Tracker_Rotation_Only" uses the tracker's orientation without its position.
- "Auto" automatically uses tracker data if a tracker is installed; otherwise, it uses glove data.
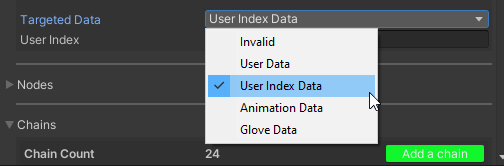
- Set the "Targeted Data" to specify where the skeleton should get its animation data from:
- "User Data": Provide a User ID from the Manus Core Dashboard to animate the skeleton accordingly.
- "User Index Data": Specify the index of the user from the Manus Core Dashboard to animate this skeleton.
- "Glove Data": Provide the ID ofthe glove from the Manus Core Dashboard to animate this skeleton.
- After setting up the above parameters, the skeleton is now ready to be animated. When entering play mode, the skeleton will animate according to the chosen targeted data.
For more detailed information and references, please refer to the Manus Unity Plugin 2.0 Documentation.