Plugins | Unreal Engine | First Time Setup
Note: This article applies to both Prime 3 Haptic XR Gloves and Prime 3 Mocap Gloves
Note: This article applies to both Quantum Mocap Metagloves and Quantum XR Metagloves.
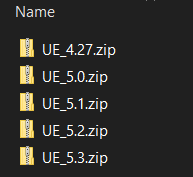
These instructions can be used with Unreal 4.27, 5.1, 5.0, 5.2 and 5.3
Installing plugin
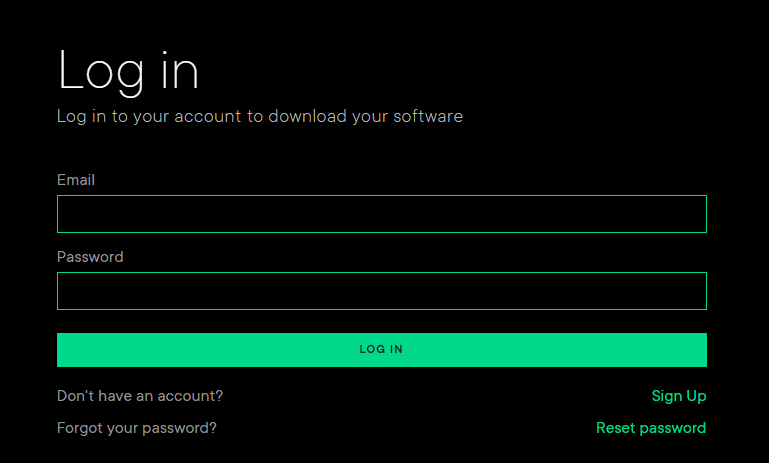
Start by logging in to our Download Center. If you don't have an account please create one.
To add the plugin, you need to download the Unreal LiveLink Plugin for MANUS Core 2 and add it to Unreal’s Plugin folder.
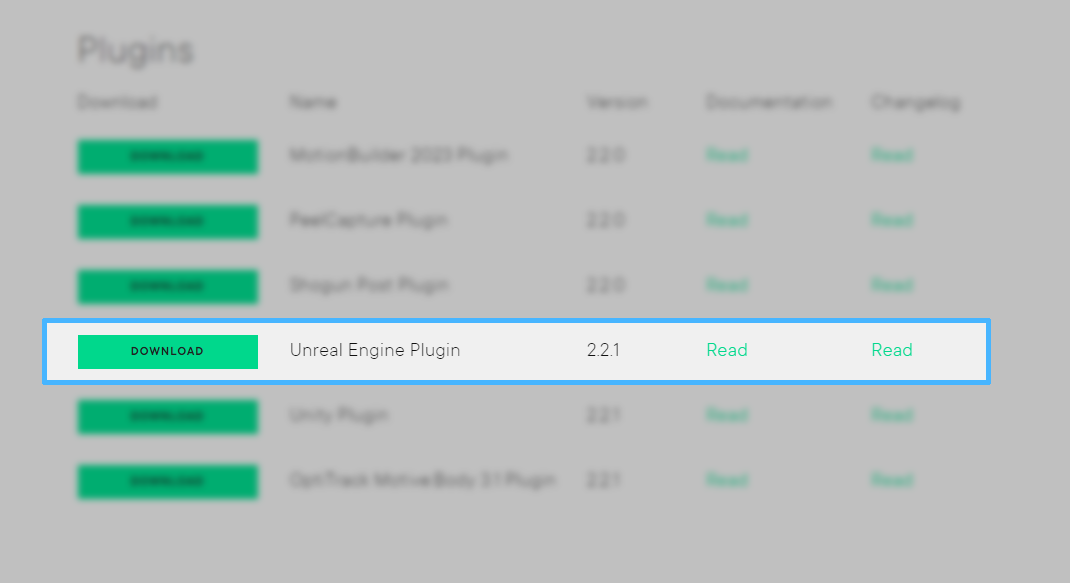
For each version of Unreal Engine there is a specific plugin provided.
To install the plugin Engine wide
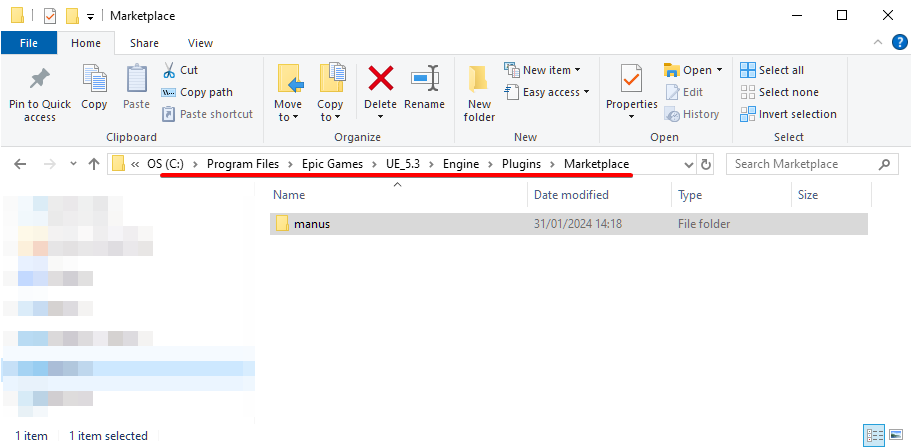
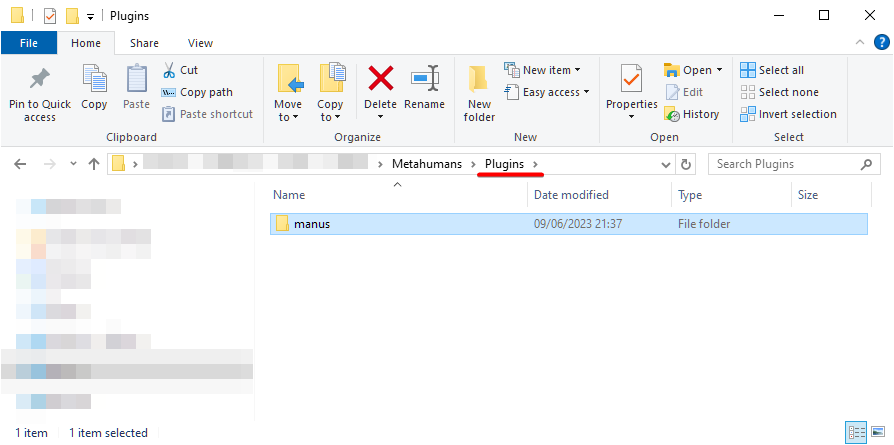
Navigate to your UE installation folder for instance: `C:\Program Files\Epic Games\UE_5.X\Engine\Plugins\Marketplace`.
Add the plugin folder named `manus` for your specific version there.
Example with Unreal 5.3:
To install the plugin project wide
Navigate to your UE project folder.
Add the manus plugin folder to the `Plugins` folder in the root of the project.
If there is no `Plugins` folder, please create a `Plugins` folder.
Example with Unreal project:
Enable plugin in Unreal
Now, launch a project in Unreal Engine.
Go to Edit > Plugins > " The plugin that you added" > and make sure the Enabled check box is checked on.

Starting unreal with plugin

Connect to MANUS Core
By default, there is no connection, and the localhost is pre-selected.
If you press this button, it will reveal a drop-down menu of all detected MANUS Core instances.

The currently selected option is marked with the green connect icon.

Once connected to your MANUS Core host of choice the icon will be shown as green, you can then get runtime data of your gloves and more.

If you press it again you can choose to disconnect from the host and connect to another.

Quite a few functions are unavailable when disconnected.
Refresh host list
When you want to refresh the detected hosts in the host selection dropdown, you can press this button.

It will scan the network for any MANUS Core active at that time and update it in the host selection list.
Setting up a model to animate
Import FBX model
Import a ready to use FBX character model.

After importing your model, you will have something like the following in your content directory:

You now right click the Skeletal Mesh and create a new animation blueprint

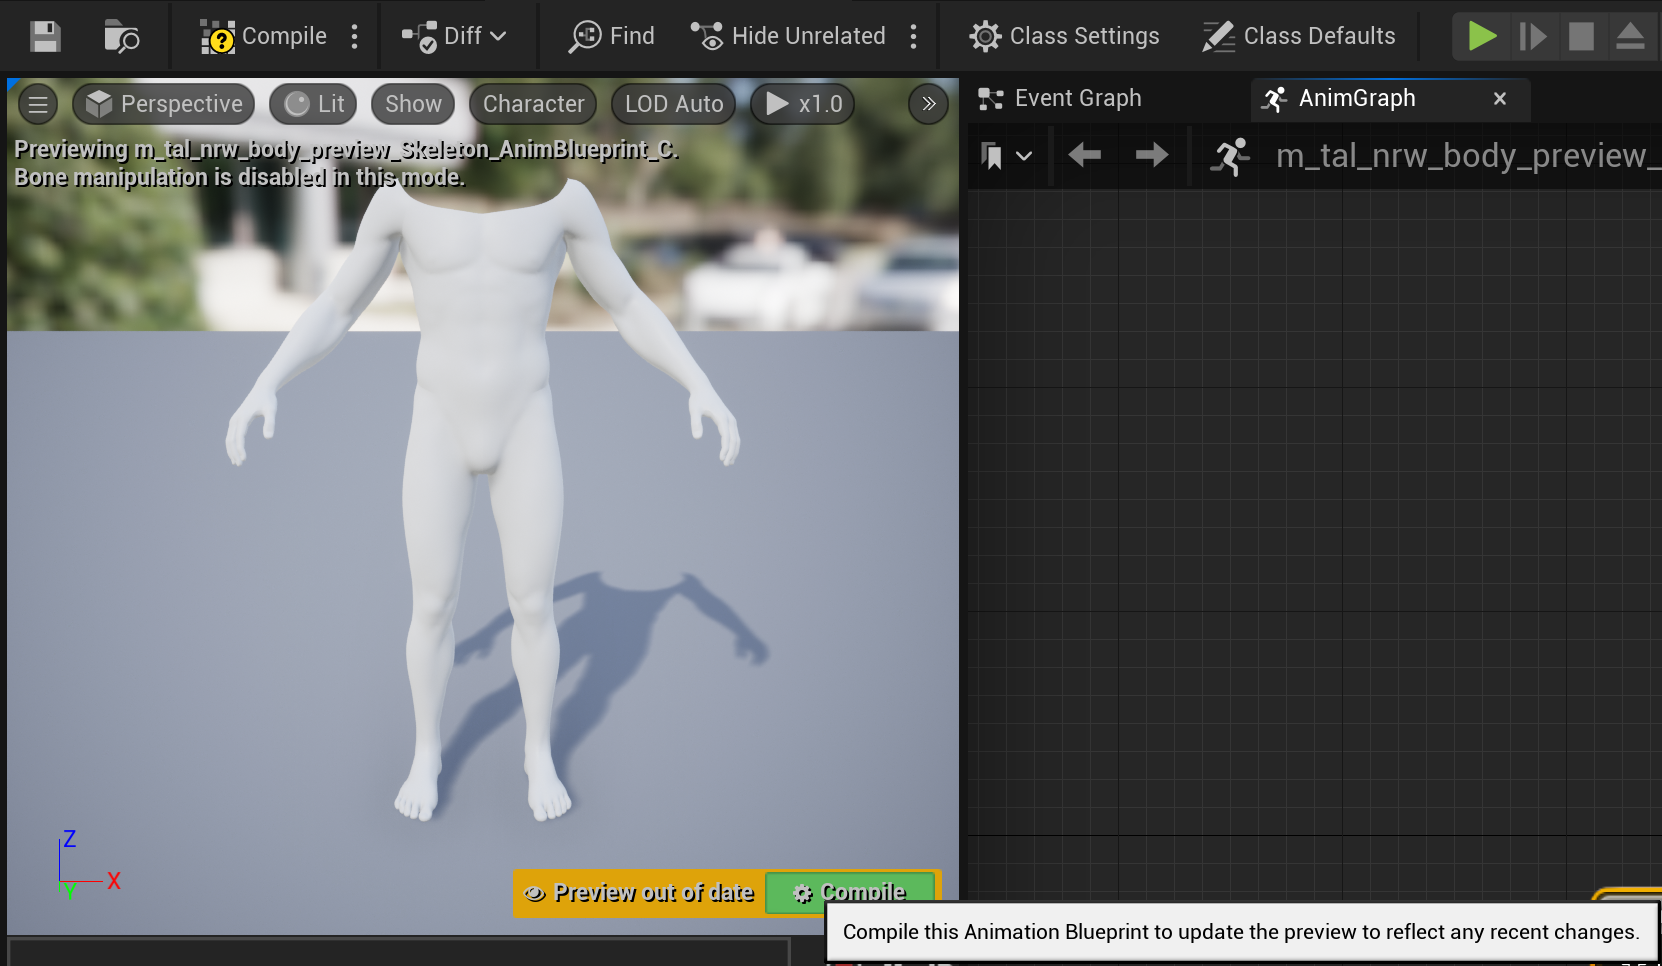
Give the animation blueprint a nice name and double click it to open it.
You will be presented with a screen like this, but for your specific model.

In the output post widget drag the Result to the left and select the “Manus Live Link Pose”

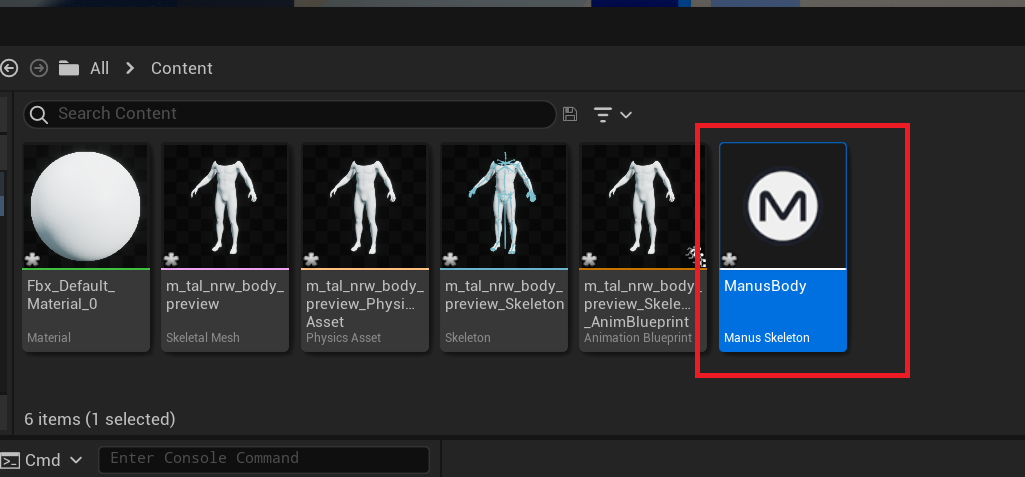
From here select the “Manus Live Link Pose” widget and go to the properties on the right side.
There select the MANUS skeleton drop downbox and create a new asset “Manus Skeleton” and give it a nice name. In this example “ManusBody” is used.

Don’t forget to compile the blueprint.
Once that is done, connect to MANUS Core for the support options that are needed.
In the main screen press the connect button to connect to a local host instance of MANUS Core via the dropdown box and then connect. Make sure MANUS Core is running.

Once that is done, double click your MANUS skeleton.
You will be presented with something like the following screen:
In this screen set the skeleton type to the type of animation you want from MANUS Core. In this case just a hand.

Also set the “Target Skeleton Type” to an identifier with which MANUS Core can identify the animation to a skeleton. In this case “UserIndexData” is a good option.
*The user index can be left to 0 in most cases. But if you have multiple users, make sure this matches what you see in the MANUS Core UI.
In the MANUS Core UI user list, the top user will be index 0, and the next in the user list will be at index 1 and soon and so forth. If the incorrect index is used, then wrong or no data will be received.

Now the mesh can be selected:

Select the mesh you imported, and it will generate the nodes needed.
All that is needed are the chains to make it possible to animate.
You can set the chains up manually, but that can be very labor intensive. For this there are 2 more options.
Either using auto allocation if it is a fairly normal model. In such case MANUS Core tries to find the right bones andrig them up. If it fails, you can always try again with the second option. And that is to send it to the Manus_DevTool. Also known as the Development Dashboard.
By clicking that button the skeleton is sent to the tool for editing.

You will be presented with a screen likethe one below:

For more specific details for this tool, check the supplied documentation of the MANUS DevTools.
For this example, the chains will be auto allocated, and we can immediately export it back to unreal.
You can hit the ‘Send to Plugin’ button, which will send the model back to the unreal plugin.
On the Unreal side in the MANUS skeleton property window, verify the IMU setting has been set for the hand if you’re not using trackers.

Once this is done you can see the animation being streamed from your glove directly into unreal:
In this case only the left hand was connected.

Import Metahuman Model
A metahuman model can be imported through Quixel Bridge. For more in-depth information please visit Epic's documentation on this.
Manus component
Once the model has been succesfully imported go to the metahuman blueprint BP_{MetaHumanName}, go to Components > Add Component > Manus component.
Here, reparent the Face (+eyelashes, beard, hair, eyebrows, etc), Torso, Legs and Feet to the Manus component.
Make sure the Manus component is attached to the root, and everything under Body component is parented to the Manus component.
Manus component should replace Body component. (Do not delete Body component yet.)
Go to Components > Add Component > Live Link and attach this to the root.
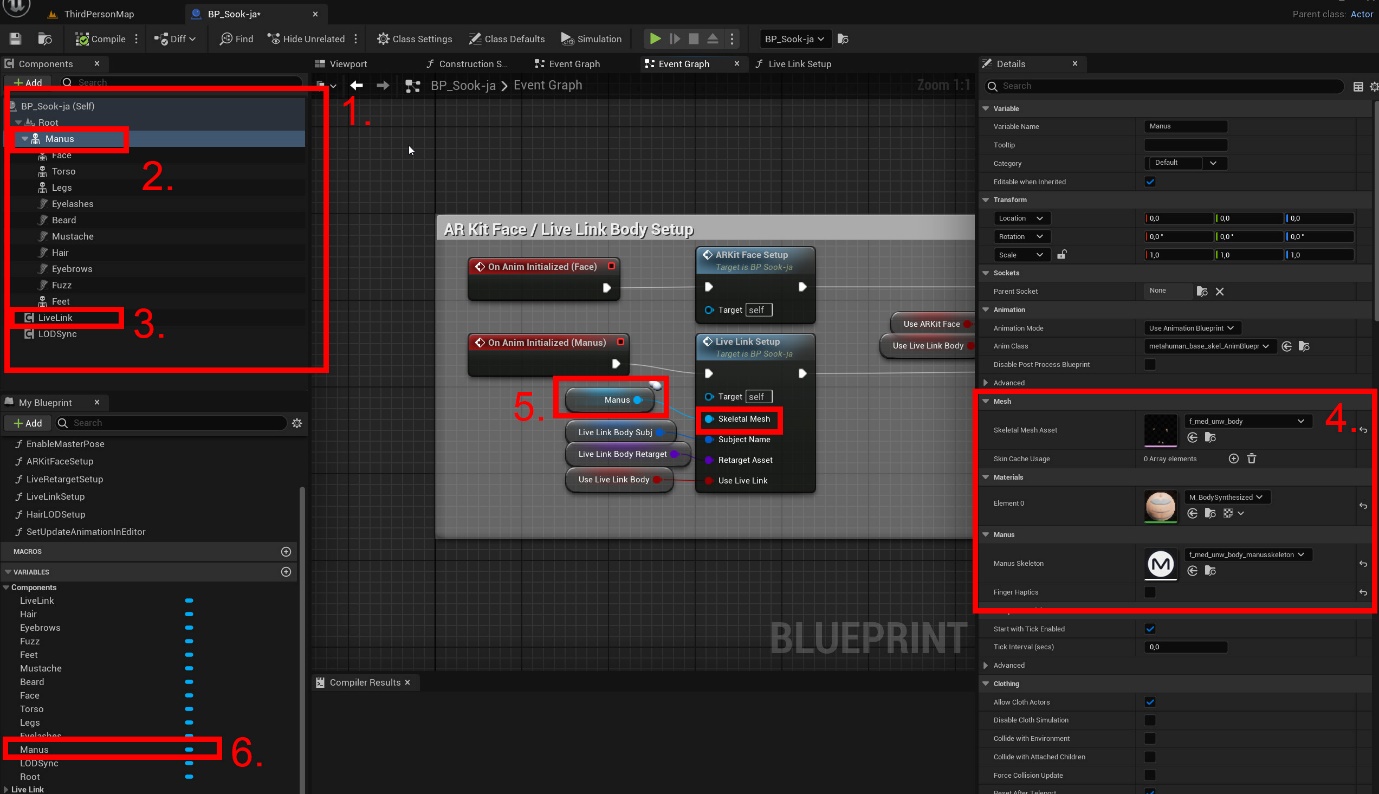
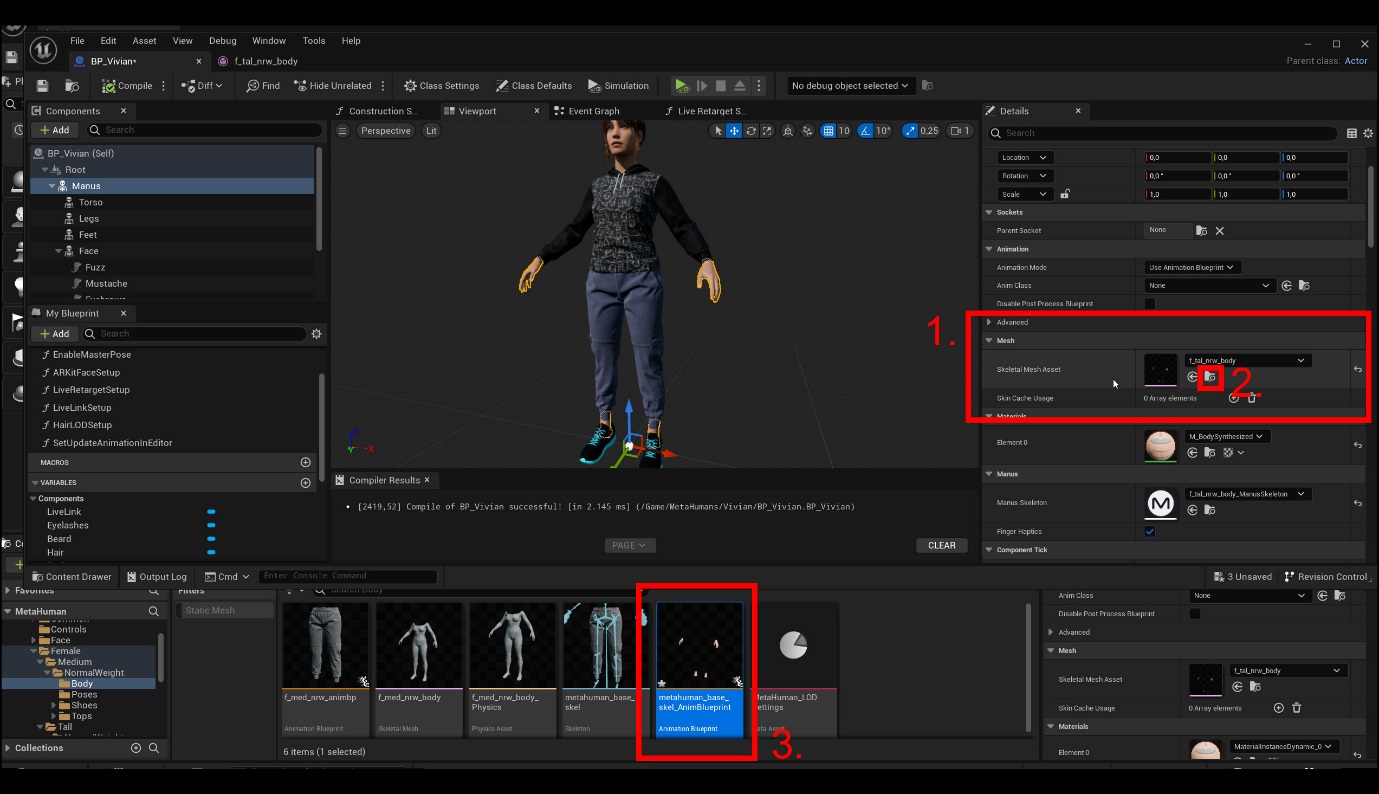
In the Manus component, change the Skeletal Mesh to the same mesh the Body component used.
Also create a new Manus Skeleton by going to Details > Manus > Manus Skeleton.
Put the Manus Skeleton next to the mesh that Body used. In this case, we are naming the Manus Skeleton the same as the Skeletal Mesh Asset (e.g. f_med_unw_body (_ManusSkeleton)).
Now you can delete the Body component.
Compiling
Once you click Compile, you will get errors, because the Body component is missing.
Go through the list of errors in the Compiler Results and drag and drop the Manus component into the Event graph, and reconnect the missing links.
When this is done, you will still receive an error message on an event. To solve this, go to the My Blueprint tab (left bottom corner in this case) > Component >Manus component (with a blue line next to it).
Click on the Manus component,and (in this case) on the right side, you will see a list of Events. Click on “On Anim Initialized” and replace “On Anim Initialized (Body)” with “On AnimInitialized (Manus)”.
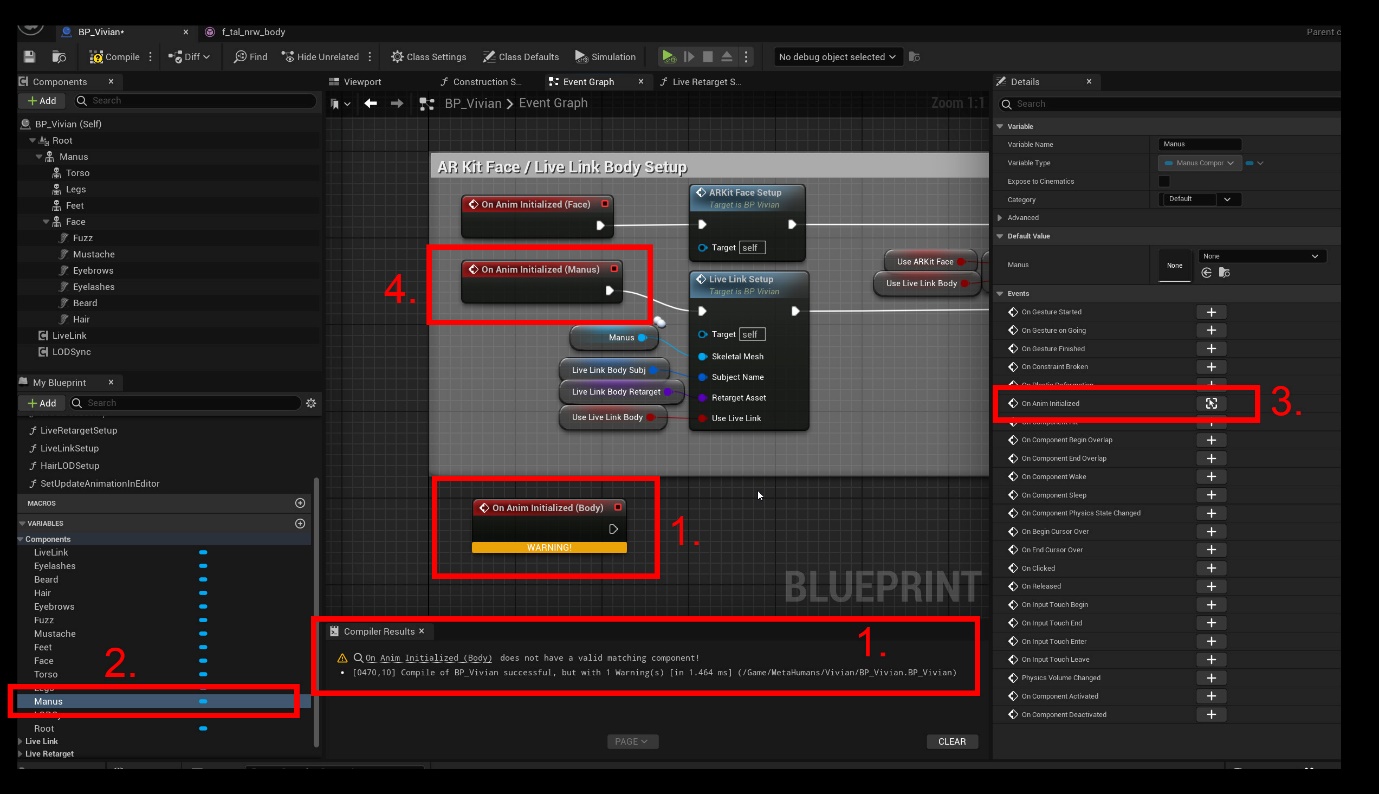
Click Compile again.
Manus Skeleton Setup
Make sure Unreal is connected with MANUS Core. (see steps above)
Open the Manus Skeleton.
Set “Manus | Skeleton Type” > Skeleton Type to “Hand”.
Set Skeletal Mesh to the same mesh you have changed in the previous step (in this case we are using f_tal_nrw_body).
Now you can either send the skeletal mesh to the Manus DevTool and auto allocate the chains there, or Import from MSKL file.
In this case, weare going to Auto Allocate the chains in the DevTool, and then hit Send to Plugin again.
Make sure the “Manus| Map Skeleton Chains”> Skeleton Chain IDs > Left - Hand > Settings > Hand > Hand Motion is set to IMU.
Click save and hit Compile in the Blueprint (BP).
Anim Blueprint Setup
In the Content Browser right-click on the Skeletal mesh (in this case f_tal_nrw_body) and navigate to Create > Anim BP.
This will create an Anim Blueprint. Note that it will do so in a different folder.
Give it a name, and open the AnimBP.
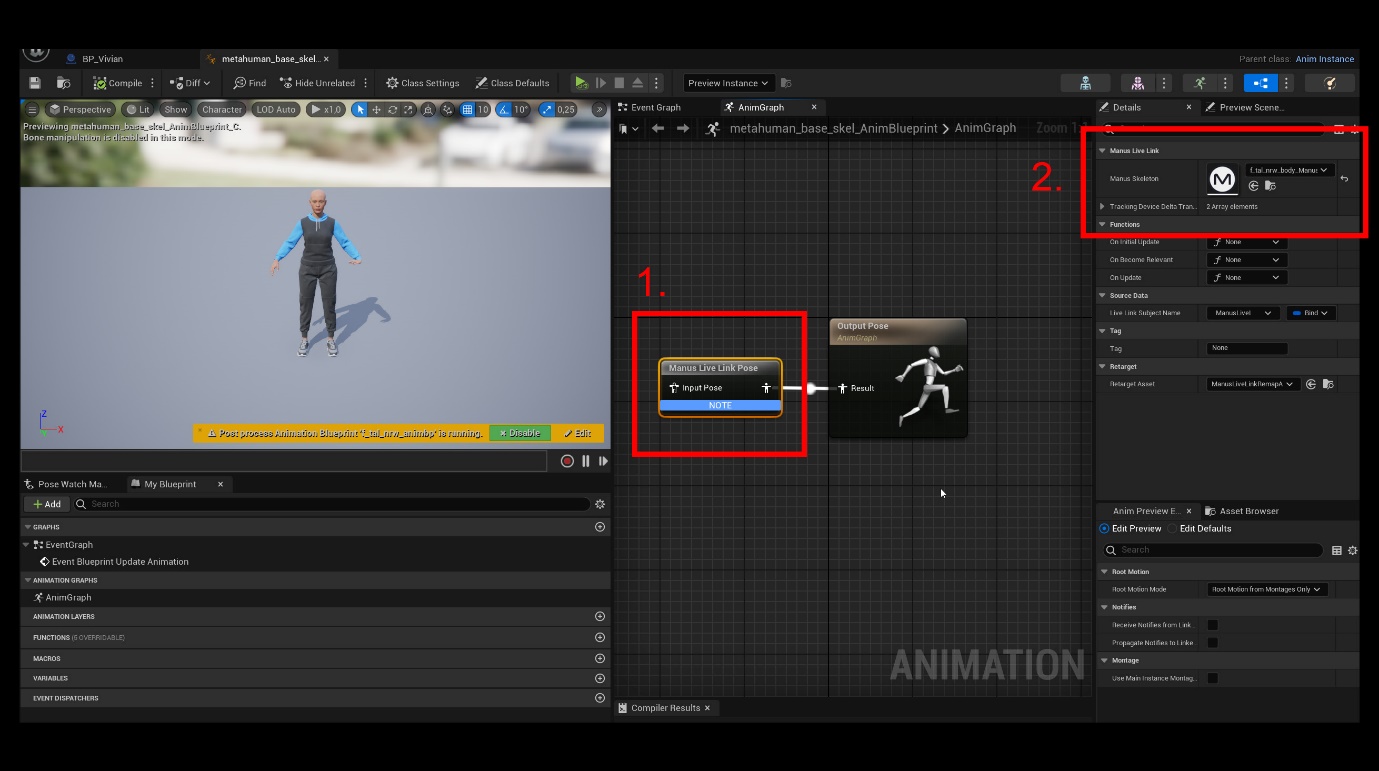
You will now see the default MetaHuman.
In the Anim Graph, you see Out Pose. Right click in the area around it and add Manus Live Link Pose.
Attach it to the Output Pose and inside the Manus Live Link Pose node > Details > Manus Live Link > attach the Manus Skeleton we have created before.
Compile the blueprint.
If you have a running Manus Core and a glove turned on, you will see the hand moving in the viewport on the left.
Blueprint options
Documentation
Several commands are available in blueprint mode and many types are defined.
For the details on available blueprint functions, please consult the MANUS Unreal documentation.
Example BluePrint
The MANUS Unreal Plugin download includes the MANUS Unreal Demo.
Exploring this demo in Unreal Engine can help understand how to set up your own project implementing the MANUS plugin.
Finding MANUS Core hosts.
To find the MANUS Host addresses the following blueprint can be used as example:

The real important function is the ‘Find Sessions’. This function will trigger the plugin to search the network for anyactive MANUS Core hosts. This can only be used if there is no current active session between the plugin and MANUS Core host and will take a few seconds before it responds.
Therefore, only continue with the blueprint upon success of this function. It will return an array of addresses found and can work with multiple network interfaces at the same time.
It is best to store these, so they can be used later when connecting to a MANUS Core host.
Blueprint making a connection
Opening the UI_ManusDemoMenu>EventGraphpresentation of the blueprint will show the following image when focused ‘On start’:

Which at first glance may look a bit daunting, but 2 main parts are important.
First, the environment the example isusing. (Single player, multiplayer host, multiplayer client)

This follows the standard unreal network environment setup, so for more details on that, check the unreal forums and documentation.
In case it is single player it will call the ‘Open Level’ function directly.
If it is the host of a multiplayer environment, it will create a session and then open the level.
But if it is a client, it will only ‘Join Session’ and signal to the plugin it is ‘Set as Client’.
Level loading will then be handled by ‘JoinSession’.
Setting it as client is important for replicating everything correctly in a networked environment.
Secondly, once everything is done, we need to signal the plugin what MANUS Core Host address to use.

If the environment is setup as the host, the supplied address from the host selection can be input into the ‘Set MANUSCore IP’. If no address is set it can receive data only via replication.
The addresses always must be found first via the ‘Find Sessions’ function, or it will not accept the address.
Alternative way of setting up a model
Like the previous way, there is another way of setting up a model in unreal.
First drag an actor into your level.

Select the actor in the sidebar and add MANUS link to it by pressing the add button.
A menu will appear, and you can type ‘MANUS’ in the search bar.


Now the MANUS link is added.

Now import your model, by right click ingthe content space and select ‘import to Game’.

Select your model from the file browser.
Then in the next window select ‘Import’.
The meshes are now loaded.
Now Select the ‘Manus Skeleton’ Option in the right sidebar of the actor and open the drop down (currently filled with ‘none’). Select ‘create a new asset ‘Manus Skeleton’.

Create a new skeleton with your preferred name.

Now right click the skeleton.
And select ‘edit’. (Or double click it)

The following window opens. Select the Skeletal Mesh dropdown.

In the new menu select your mesh you imported.

Then Select the ‘Skeleton type’ combobox and select ‘hand’ for this example.

Now Press the ‘Send to Manus DevTool’ button. (Make sure unreal is connected to your MANUS Core host first though).
Just as in the previous chapter, set up the rigging of your skeleton in the MANUS DevTools and when done, send it back tothe unreal plugin.
Once done you will return to this screen and see the chains allocated.

Important: Make sure the ‘Skeleton Target Type’. Make sure this matches the target selected, or no/wrong animation data will be received for this skeleton. Usually setting it to ‘UserIndexData’ andthe ‘Target Skeleton user index data’ to ‘0’ will select the first user.
User indexes start counting from 0 and can be verified in the MANUS Core UI.
This will match the MANUS Core user list. With the top user being index 0, and the next in the user list at index 1 and so on and so forth. If the incorrect index is used, the wrong or no data will be received.
Now return to the main window and right click the mesh.
In the dropdown menu select ‘AnimBlueprint’ and create a new blueprint.

Now in the sidebar, under the actor, select an animation blueprint in the ‘anim class’.
In the dropdown menu, select the animation blueprint that was created.

Then double click the animation blueprint that was created.
Drag the input ‘Output Pose’ into the blueprint and select ‘Manus Live Link Pose’.
Select the ‘Manus Live Link Pose’ and select the ‘Manus Skeleton’ in the right side bar. Select the skeleton previosuly created.


Don’t forget to compile the blueprint.
Your actor should now be fully ready to animate when in play mode.
Always make sure the skeleton is setup forthe right user. And of course the MANUS host connection is active! See the MANUS skeleton section above for those settings.